
Are you planning to replace your built-in oven or make repairs?
Removing a built-in oven might seem daunting, but with the proper guidance, it can be a manageable DIY project.
If you want to remove an built in oven from your kitchen, whether for replacement, repair, or remodelling purposes, it’s essential to approach the process carefully and cautiously. While the task may seem daunting initially, with the proper knowledge and a systematic approach, you can successfully remove an built in oven without causing any damage.
This article will guide you through removing a built-in oven, ensuring a smooth and hassle-free experience.
Introduction
Before diving into the removal process, it’s essential to familiarize yourself with the layout and components of a built-in oven. Built-in ovens are typically installed within cabinetry or wall enclosures, providing a streamlined and integrated appearance in your kitchen. Removing a built-in oven involves disconnecting it from the power source, detaching specific components, and carefully uninstalling it from its designated space.
Safety Precautions
Safety should be your top priority when removing a built-in oven.
Follow these essential safety precautions to ensure your well-being and prevent any accidents:
- Wear protective gear, including gloves and safety glasses, to protect yourself from potential hazards.
- Ensure the oven is disconnected from the power supply to avoid the risk of electrical shock.
- Use proper lifting techniques or seek assistance when handling heavy oven components to prevent strain or injury.
- Keep a fire extinguisher nearby in case of any unexpected fire hazards.

Gather the Necessary Tools
Before you begin the removal process, gather the following tools:
- Screwdriver (either Phillips or flathead, depending on the screws used)
- Adjustable wrench
- Pliers
- Utility knife
- Flashlight
- Dolly or hand truck (if necessary)
Having these tools readily available will make the removal process more efficient and help you tackle any challenges that may arise.
Turn Off the Power
Before starting any work on the built-in oven, turning off the power supply is crucial. Locate the circuit breaker or fuse dedicated to the oven and switch it off. Double-check that the power is disconnected by attempting to turn on the oven or using a voltage tester.
Disconnect the Oven
To remove the built-in oven, disconnect it from the electrical supply and any gas or water connections it may have. Follow these steps:
- Locate the junction box or electrical outlet behind the oven.
- Disconnect the oven’s power cord from the outlet or remove the fuse from the junction box.
- If your oven is gas-powered, turn off the gas supply using the shut-off valve.
- If your oven is connected to a water line, shut off the water supply valve and disconnect the water line.
Remove the Oven Trim
The oven trim refers to the decorative panelling that surrounds the built-in oven.
Follow these steps to remove it:
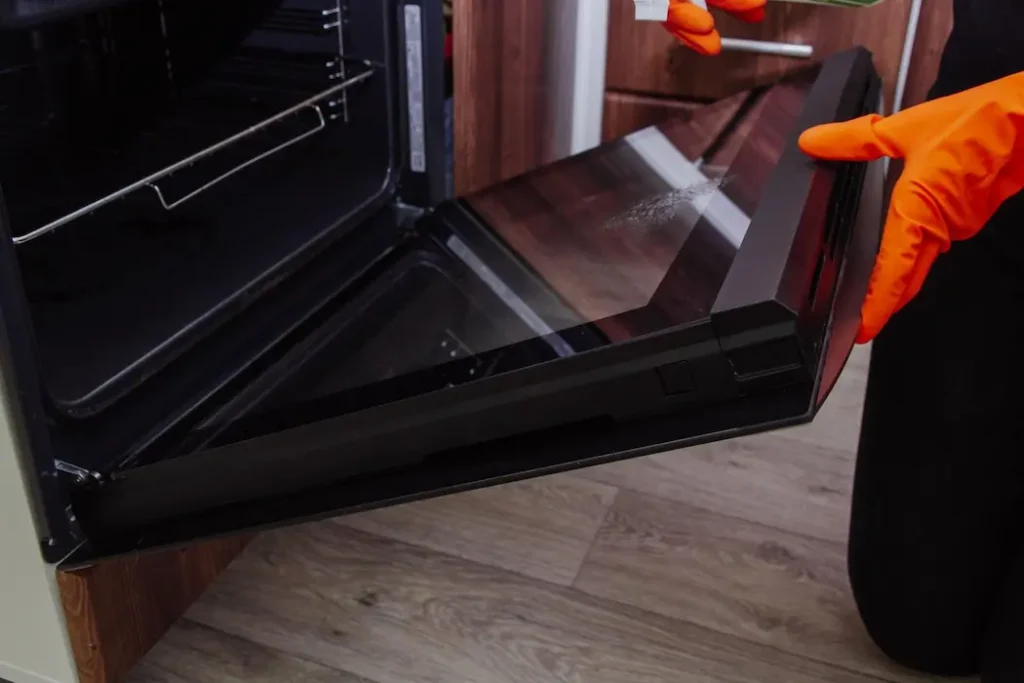
Removing the oven door
Most built-in ovens have removable doors, which make the removal process easier.
Here’s how you can remove the oven door:
- Open the oven door to its fully extended position.
- Locate the hinges on each side of the door.
- Lift the locking tabs on the hinges to unlock them.
- Slowly close the door until it’s halfway closed.
- Lift the door out of the hinges.
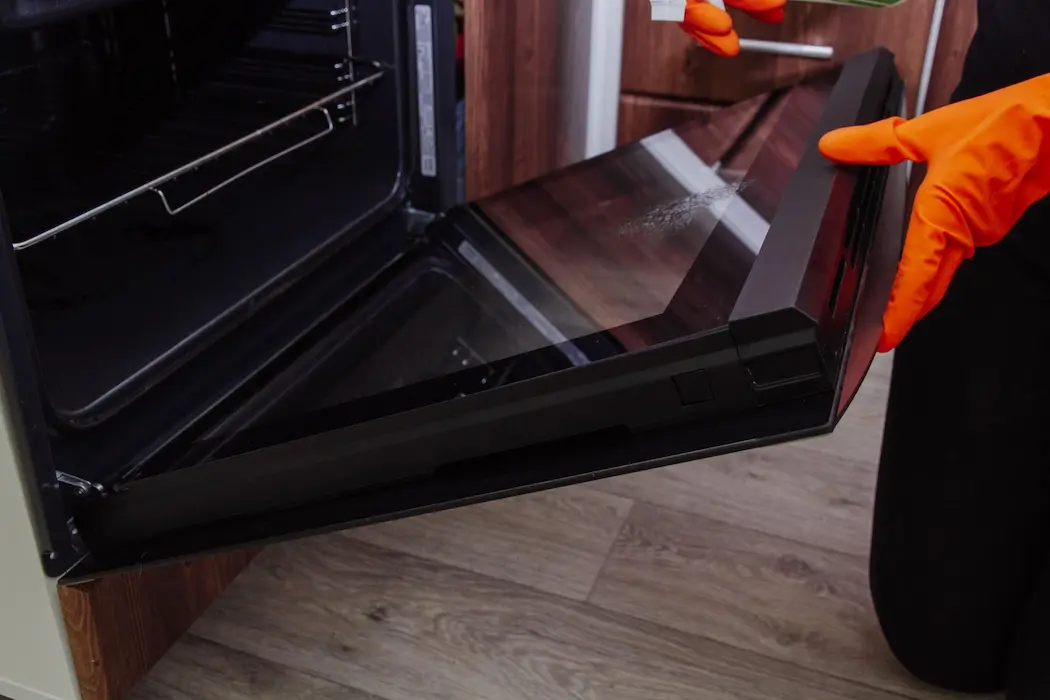
Detach the Oven Door
Removing the oven door will make the uninstallation process more accessible and safer.
Here’s how you can detach the oven door:
- Open the oven door fully to expose the hinges.
- Locate the hinge locks on both sides of the door. These locks hold the hinges in place.
- Depending on the type of hinges, you may need to lift or rotate the hinge locks to unlock them.
- With the locks released, close the oven door halfway.
- Hold the sides of the door firmly and lift it upward to disengage the hinges.
- Carefully set the oven door aside in a secure location.
Removing the oven completely
Now that the oven is disconnected from the power supply and the wiring, you can safely remove it from its position.
Follow these steps:
- With the help of another person, carefully lift the oven up and out of the cabinet.
- Place the oven on a sturdy surface, making sure it is well-supported to avoid any damage.
- Take this opportunity to clean the area where the oven was installed before proceeding with your next steps.
Uninstall the Oven
Now that you have disconnected the oven from its power and utility connections and removed the trim and door, it’s time to uninstall the oven from its enclosure.
Follow these steps:
- Locate the screws or brackets that secure the oven to the surrounding cabinetry or wall enclosure.
- With the screws or brackets removed, check for any additional securing mechanisms, such as brackets on the sides or rear of the oven.
- Release or remove these additional securing mechanisms as needed.
- Once all attachments are removed, gently slide the oven forward, ensuring it clears the surrounding cabinetry or enclosure.
- If the oven is heavy or difficult to move, use a dolly or hand truck to remove it.
- Slowly and steadily, guide the oven out of its space, taking care not to scratch or damage the surrounding surfaces.
Clean the Area

With the oven successfully removed, it’s a good idea to take the opportunity to clean the area before installing a new oven or proceeding with any remodelling plans.
Follow these steps:
- Thoroughly vacuum or sweep away any loose debris, crumbs, or dust from the oven’s former space.
- Use a mild cleaning solution and a soft cloth to wipe down the interior surfaces of the cabinet or enclosure.
- Pay attention to any stains or spills and clean them accordingly.
- Touch up the paint or repair damaged areas to ensure a seamless look if necessary.
Conclusion
Removing a built-in oven is a complex task. Still, by following the step-by-step process outlined above, you can successfully accomplish it. Remember to prioritize safety by turning off the power and taking necessary precautions. Gather the required tools, disconnect the oven from its power and utility connections, remove the trim and door, and then uninstall the oven from its enclosure. Finally, take the opportunity to clean the area before moving forward with any further plans.
FAQs
Can I remove a built-in oven by myself, or do I need professional assistance?
While removing a built-in oven on your own is possible, it is recommended to seek professional assistance, especially if you need clarification on the process or if the oven is particularly heavy or complex to uninstall. Professionals have the experience and knowledge to handle the task safely and efficiently.
Do I need to disconnect the gas and water supply if my oven is electric?
Suppose your oven is electric and has no gas or water connections. In that case, you can skip the steps related to disconnecting those utilities. However, always ensure the power supply is turned off before starting work.
What should I do if I encounter difficulties during the removal?
Suppose you encounter difficulties during the removal process, such as stubborn screws or unfamiliar attachments. In that case, it’s best to consult the oven’s manufacturer’s manual or seek guidance from a professional. They can provide specific instructions or advice based on the oven model.
Do I need any special tools for removing a built-in oven?
You will need a screwdriver, adjustable wrench, electrical tape, work gloves, masking tape, and plastic bags for storing screws and small parts.
How long does it take to remove an built-in oven?
The time required to remove an built in oven can vary depending on your experience and the complexity of the oven model. On average, it may take approximately 1-2 hours.